This article will explain how to properly create and configure a MongoDB cloud account and prepare an environment for tutorials. MongoDB is the NoSQL document database that has been gaining popularity in recent years. The key to its success is to be found in its continuous evolution that has led it to be a versatile product for many application fields, but above all reliable.
The use of replica sets to have horizontal redundancy, the introduction of multi-document transactions and the ability to extract complex analysis on fly using aggregation pipelines are just some of the many features appreciated by developers and system administrators. To discover all its features you can always refer to the official guide that you can find here.
The flexibility of the models helps both programmers and designers in their work reducing in most cases the development time of new applications or new features. If you are curious to understand how to make the most of MongoDB for your applications I recommend reading my book on the subject available on Amazon at the following link
Creating a MongoDb Atlas Account
MongoDB Atlas is MongoDB’s fully managed cloud service through AWS, Google Cloud and Azure. It provides high availability, scalability and compliance with high standards of data security and privacy through a very simple and intuitive web interface.
A strong point of this service is the possibility of having a completely free plan with which to test your applications or simply practice using MongoDB. This plan provides, in fact, a MongoDB installation in replica set with 512 MB of storage. For more details on pricing we refer you to the offcial website.
In this tutorial, we will use MongoDB Atlas just to have a ready-to-use MongoDB installation to practice without having to configure your workstation. In addition, we will go through the sample databases that come with the installation.
MongoDB Atlas Registration
First you need to log on to the MongoDB website and register for a free account. You can use a Google account or your email. Below is the registration screen.
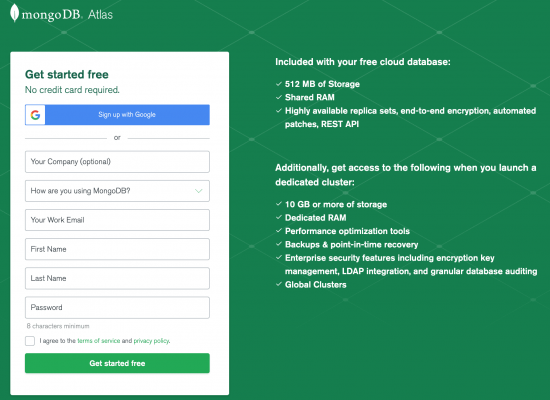
Once registered you will have to log in to your account to properly configure the cluster. Let’s see below how to set up a completely free cluster.
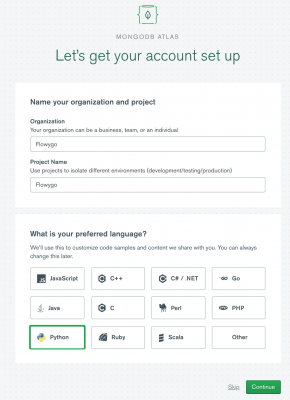
First you’ll be asked for the name of your organization and your project. You’ll also have to indicate at least one programming language with which you usually develop. This will be useful for the communications that MongoDB will send you.
Cluster type selection
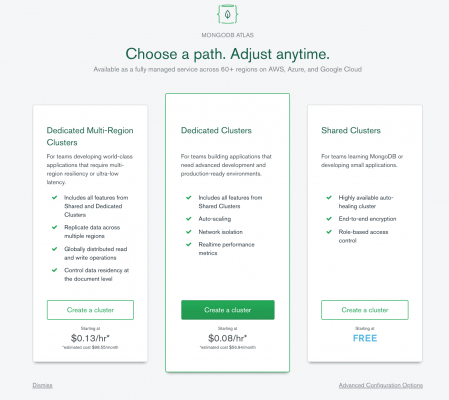
At this point you are ready to configure the cluster. The following options will be shown. Be careful to choose the rightmost option named “Shared Cluster”. All other options, as shown in the figure, have costs that depend on the hourly use of the cluster. These options in fact present additional functionality compared to the basic version. In the case of the dedicated cluster you have a dedicated machine that can be adapted according to your needs and isolated from the other machines. In addition you can monitor the performance of MongoDB in real time. The multi-region version provides the ideal solution if the application that will use MongoDB will have to respond to requests from different parts of the world. In fact, it will be possible to have exact and synchronized copies of your database on different clusters scattered around the world. This reduces network latencies making the interaction with the database very efficient.
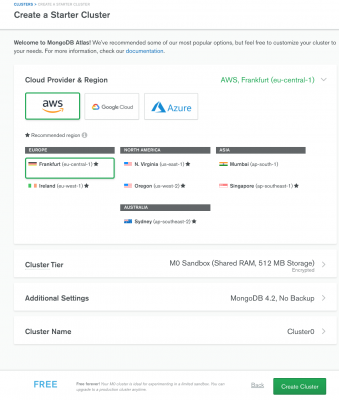
Once you have chosen the Shared cluster plan you need to define the cloud service that will be used and in which region it will be created. The services currently available are AWS, Google Cloud and Azure. For the free version there is not much difference between them. However if you choose a paid version this choice may affect the cost. Once you choose the service provider you will be shown a list of available regions. To reduce network latency and therefore response times, the advice is to choose the region closest to the country where you are. For example, if you work in Italy and have chosen AWS, the suggestion is to choose Germany, while if you are in Great Britain Ireland is definitely a winning choice.
Then there are other options that can be changed. The default settings are the ones set to get the account completely free.
The Cluster Tier determines the space available for our databases and backup policies. Each solution has a monthly cost.
The Additional Settings are used to define the version of MongoDB installed and some other options to be configured in the case of dedicated servers.
The Cluster Name is the name that will be used for connections.
At this point the cluster will be created. It will take a few minutes for all the settings to be implemented. The following screen is what will be displayed as soon as the configuration part is finished.
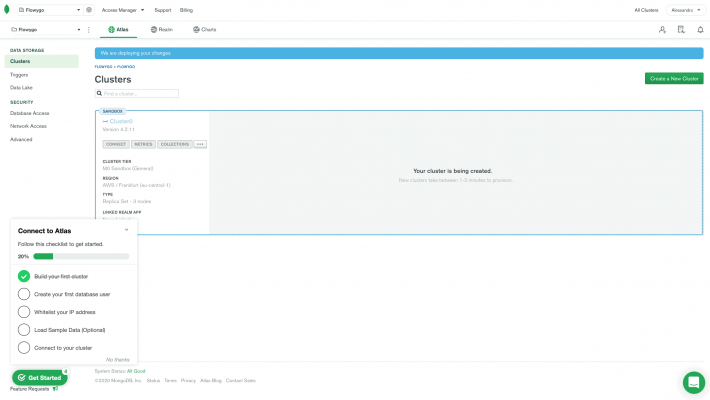
Cluster configuration
At this point you can follow the suggestions that MongoDB Atlas suggests. You must first create a user to access the database. To do this either click on the tutorial suggestion or go to the side menu item “Database Access” under SECURITY. Since no user is created by default the screen that will be displayed will be as follows.
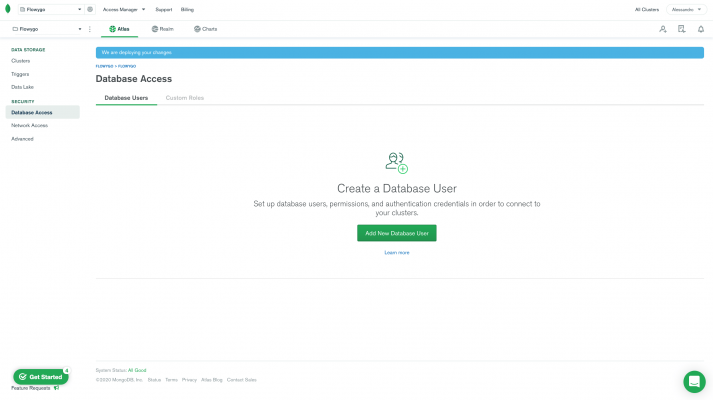
This view will be useful also in the future to properly manage all the users and their permissions that can access the database. By clicking on the green button “Add New Database User” we will be shown a screen to set the access credentials of the new user.
First we have to define the authentication method. Depending on the authentication method different information will be required.
With the password method the user name and password are required. It’s possible to auto-generate the password to make it secure. Differently with the certificate you have to specify in addition to the user name if the certificate will be automatically downloaded when the user is created and its expiration. Finally, with the IAM (Identity and Access Management) method based on the service provider (in the example AWS), information is required to properly identify the user.
The other information that is requested is the user’s privileges. By default, the ability to read and write to all databases is selected. The other options under the Built-in Roles category are Atlas admin and Read only. It is of course possible to specify user roles for each collection in each database. You can find the available roles and their description in detail in the official guide.
Finally you can restrict access to specific clusters or data lakes and define if the user is temporary. A temporary user will be automatically deleted from the system when the defined time expires. Possible values are 6 hours, 1 day and 1 week.
Once the user is set up we will find the basic information in the Access Database screen. Here you will be able to edit the user information, delete the user or add new users.

At this point you need to configure remote access. Otherwise the database will be accessible only through the web interface of the MongoDB Atlas site. From the screen below you must click on the “Add IP Address” button to begin the configuration.
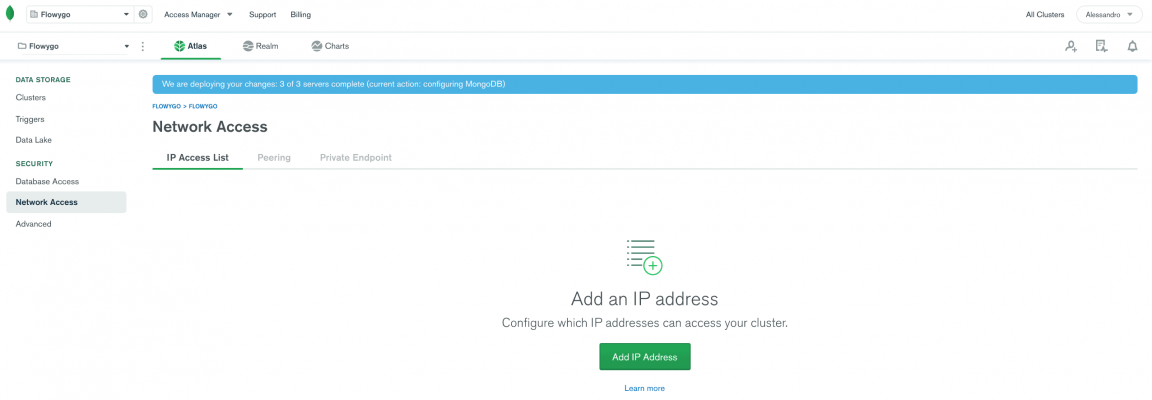
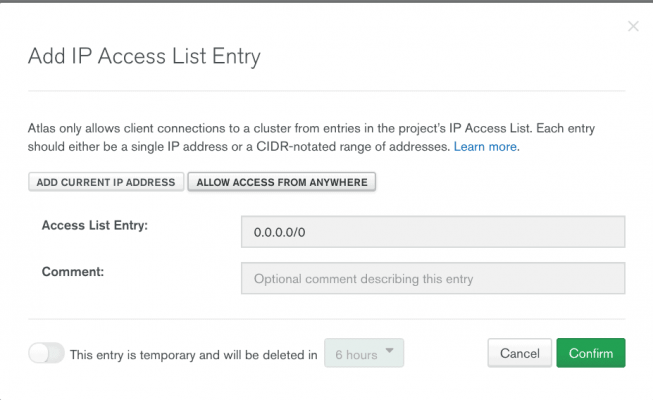
At this point a popup will open as shown in the figure below. You can enter the current IP address from which you are connected or set one or more addresses that are deemed safe. If you don’t want to restrict access based on IP address, a recommended choice for practicing with MongoDB or testing your applications, you can enter in the Access List Entry field the value 0.0.0.0/0. In this way anyone with the login credentials will be able to connect to your cluster. Finally, you can make this connection configuration temporary by making explicit the time for which it will be active.
Now the cluster is configured to be used. If you see a message on a blue background at the top it means that the changes are being processed. Wait a few minutes until the message disappears to proceed with using the MongoDB installation.
Loading sample databases
Once the cluster is properly configured you can proceed with loading the sample databases. To do this you need to click on the icon … to open the menu and select Load Sample Dataset as shown in the figure below.

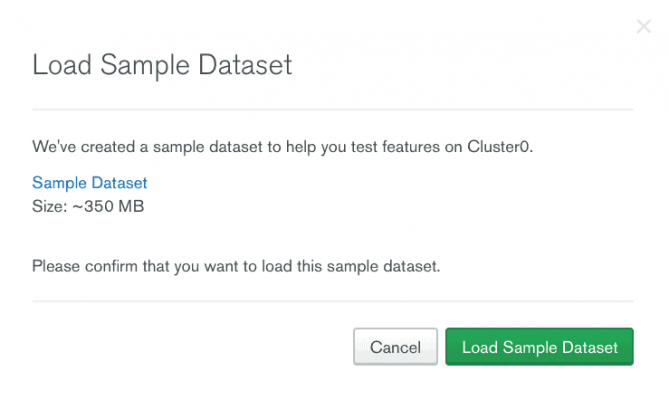
You will be shown a popup to confirm the loading of the sample datasets. This will occupy most of the space available, about 350 MB. So load it if you intend to practice with MongoDB to understand all its potential. If instead you need the free installation to develop a prototype of your application, avoid overloading the system with this data. To confirm the loading just click on the Load Sample Dataset button. The procedure will start immediately and will only take a few minutes.
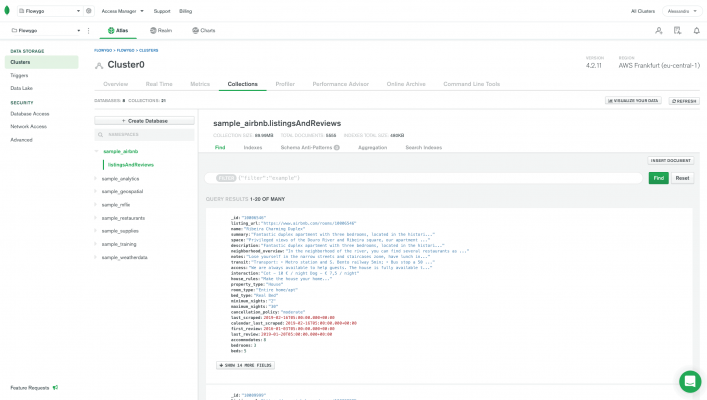
At this point you can view the databases and their collections by selecting on the COLLECTIONS button found on the left in the cluster summary screen. The screen you’ll be presented with is very similar to that of MongoDB Compass, the standalone tool that allows you to manage databases. However, the functionality is slightly different from its desktop-based sibling. For example, it is possible to perform filtering queries on the data, but projections, sort and result set limitations (limit and skip) are currently missing. It is still a very useful tool to quickly view newly loaded collections, manage indexes and define rules for document validation.
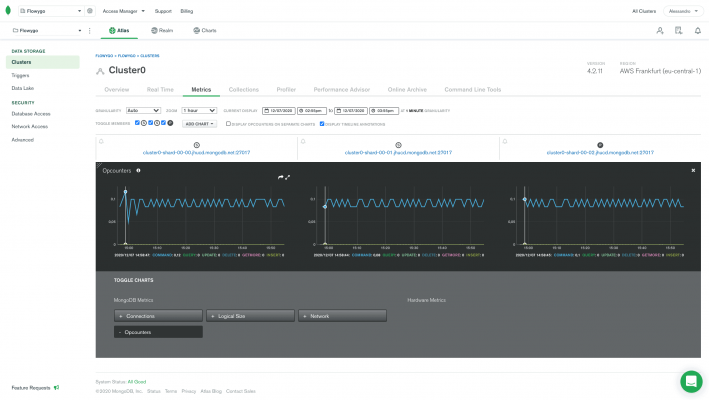
It is also possible to view some metrics related to MongoDB with graphs. Clicking on the Metrics menu displays the screen below. The metrics available in the free version are:
- Network
- Connections
- Logical Size
- Opcounters
Returning to the sample collections you will find the complete list in the table below. Also shown is the link to the detail page for each database that describes the structure of the documents in each collection.
| Name | Description |
|---|---|
| sample_airbnb | Contains details of some properties posted on the AirBnB site. |
| sample_analytics | Contains sample financial services data. |
| sample_geospatial | Contains geographic information about some shipwrecks. |
| sample_mflix | Contains information stored by an application for the collection of movie cards with related reviews by the public and the list of theaters in the USA. |
| sample_restaurants | Contains information the cards of some restaurants in USA with relative geographical location. |
| sample_supplies | Contains details of a possible office supply store. |
| sample_training | It contains some data from the training services provided by MongoDB such as user test and exam ratings. |
| sample_weatherdata | Contains some weather forecasts related to the USA. |


