
The application of Machine Learning on unstructured data has gained a lot of value for many businesses. For example, Aucnet built its own model to classify images of car parts and estimate the price. Differently, Ocado used Natural Language APIs to classify customer emails in order to better manage emergencies and/or complaints. Giphy, on the other hand, uses Google Cloud APIs to detect text in images and identify inappropriate content. Other companies have developed chat bots to improve the customer experience while shopping on e-commerce sites. But there are also other industries, such as the medical industry, that benefit from Machine Learning to speed up and/or improve processes and analysis of the data they hold.
Since the use of Machine Learning requires very high computational resources for some tasks, one possible solution is to leverage cloud computing. Among the various providers we can’t mention Google, Amazon and Azure. In the article Google Cloud: introduction to the platform we have seen the potential of the platform offered by Google.
In this article we will use this platform, also called GCP, to create an image classifier. To do this, no knowledge of Machine Learning or programming will be required. We will see, in fact, how it is possible to ask GCP to create a model by providing only some initial data. We will evaluate the performance of the created model and its predictive ability.
Preparing the GCP environment
Google Cloud Platform (GCP) is Google’s cloud platform. In order to use it, you need to create an account and connect a payment method. In fact, using the platform is not free. You pay based on the resources you use. To evaluate the platform, you receive $300 upon account creation. You can find all the pricing details on the official page.
If you need to practice on other projects besides the one presented, you can use the Qwiklabs service. In this case you don’t pay for the Google Cloud platform but only for the labs that are offered. In short, a great alternative to practice with GCP without the risk of making a mistake in some configuration and finding unexpected expenses at the end of the month on your account. Details on Qwiklabs’ plans can be found here.
Goals
In this tutorial we will see how to upload a labeled dataset to Cloud Storage and link it to AutoML Vision with a CSV file containing the image classification. After training a model with AutoML Vision, we will evaluate its accuracy. Finally, we will use the created model to classify new images.
You can use the environment you prefer. Just a reminder that in case you are using your own account you will have to release all resources at the end of the tutorial to avoid unnecessary expenses.
Task 1. AutoML Vision Setup
AutoML Vision provides an interface for all phases of training an image classification model and generating predictions about it. Before you get started you need to enable the AutoML API.
Open the navigation menu and select API & Services > Library In the search bar that appears, type “Cloud AutoML API”. Then click on the Cloud AutoML API result and click on the Enable button.
As soon as the API is enabled, which may take a moment, you will be shown the following page.

Create a Cloud Storage bucket for your data
In order to load the data for model training, we need to create a bucket in the Cloud Storage. We use the GCP console to do this.
On the title bar in the upper right hand corner, click on Activate Cloud Shell (![]() ). At this point, a box will open at the bottom of the screen. If prompted, click on Continue or Authorize.
). At this point, a box will open at the bottom of the screen. If prompted, click on Continue or Authorize.
To create a new bucket, type the following command in the shell.
gsutil mb -p $DEVSHELL_PROJECT_ID \
    -c regional    \
    -l us-central1 \
    gs://$DEVSHELL_PROJECT_ID-vcm/
The variable $DEVSHELL_PROJECT_ID, contains the value of the current project. This way we don’t have to retrieve it from GCP home. The name of the bucket will be equal to the identifier of the project we are working on followed by the string -vcm.
Leave the Cloud Shell window open because it will still be needed.
Clicking on this link will open a new browser tab related to AutoML datasets. If it does not open to you, you need to verify that the Cloud AutoML API is enabled.
Task 2. Upload images to Cloud Storage
To train a model to classify images, you need to provide labeled data, This will allow the model to develop an understanding of the image features associated with the different categories. In this example, your model will learn to classify three different types of clouds: cirrus, cumulus, and cumulonimbus. To use AutoML Vision, you will need to save your model training images to Cloud Storage.
In the Cloud Console, open the navigation menu and select Cloud Storage > Browser.

The page you will be shown should contain the bucket created in the previous step.

You can click on the Refresh button to refresh the view if necessary.
The images we will use for the model are publicly available in a Cloud Storage bucket. To copy the images to our project’s bucket we type the following command in the shell.
gsutil -m cp -r gs://cloud-training/automl-lab-clouds/* gs://$DEVSHELL_PROJECT_ID-vcm/ When you have finished copying the files, you can view the folders for the three categories of clouds that we will classify using the following command.
gsutil ls gs://$DEVSHELL_PROJECT_ID-vcm/ View images using the Cloud Storage Console UI
To view the contents of the bucket and the copied folders, you can also use the Cloud Storage interface. Selecting the bucket on the Cloud Storage page you should see the following content. In case it is not visible click on the Refresh button.

If you click on the individual image files in each folder, and then again on the URL, you can see the photos we will use to train the model.
Task 3. Create a dataset for AutoML Vision training
Now that the data is in Cloud Storage, we need a way for AutoML Vision to access it. We will use a CSV file where each row contains a URL to a model training image and the label associated with that image. This CSV file has already been created. You need to copy it to the bucket and update the content so that the urls contain the name of the bucket of your project. This can be done from the GCP shell with the following commands.
gsutil cp gs://cloud-training/automl-lab-clouds/data.csv .
head --lines=10 data.csv
sed -i -e "s/placeholder/$DEVSHELL_PROJECT_ID-vcm/g" ./data.csv
head --lines=10 data.csv
gsutil cp ./data.csv gs://$DEVSHELL_PROJECT_ID-vcm/
gsutil ls gs://$DEVSHELL_PROJECT_ID-vcm/
To see if the operation was successful you can simply view the contents of the bucket through the GUI. Otherwise, run the following command from the shell to view the contents of the bucket.
gsutil ls gs://$DEVSHELL_PROJECT_ID-vcm/* Copy the path to the csv file to the clipboard which will look like: gs://projectid-vcm/data.csv
Return to the AutoML Vision datasets page. At the top of the screen, click on + New dataset.
Type clouds for the dataset name and leave you selected single label classification. Finally, click Create dataset to continue.

In the next screen you need to indicate the location of the images for training the model (those loaded in the previous step).
Choose “Select a CSV file on Cloud Storage” and add the URL of the data csv file you copied to the clipboard. If by chance you did not write it down, no problem. You can use the Browse function to find the csv file. When you see the checkbox in green, you can select Continue to proceed.

It will take about 10 minutes for the image metadata to be processed. Once the import is complete click on the Images tab to see the images in your dataset.
You can filter by different labels in the left menu to see the training images. In this example, only 20 images are used for each category to speed up the model generation process. For a more accurate model, we recommend using at least 100 images for each category.
Note: If you are working with a dataset that is not already labeled, AutoML Vision provides an internal manual labeling service.
Task 4. Training the model
Now everything is ready to train the model! AutoML Vision handles all of this automatically, without requiring you to write any lines of code.
Click on the Train tab and then on Start training. Enter a name for the template, or use the default automatically generated name. Leave Cloud hosted selected and click Continue.

For the next step, type the value “8” in the Set your budget * box and select Deploy model to 1 node after training. This process (auto-deploy) will make the model immediately available for prediction after testing is complete.
Click Start training.

Model training can take more than an hour to complete.
Task 5. Model evaluation
Once the training is complete, select the Evaluate tab. Here you will see the Precision and Recall information for the model. If you scroll down you can also see the confusion matrix.
Task 6. Generate predictions
Now it’s time for the most important part: generating predictions with the trained model using completely new data.
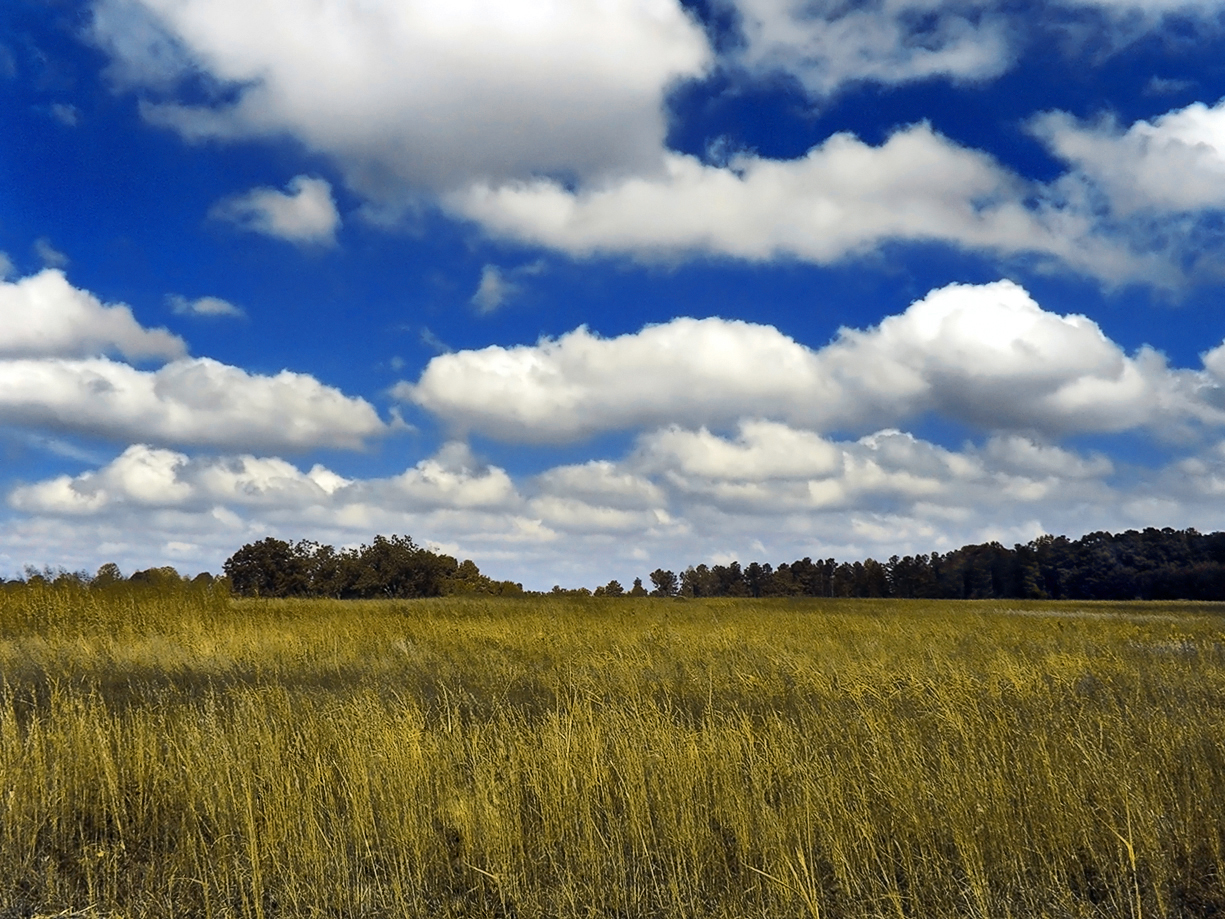
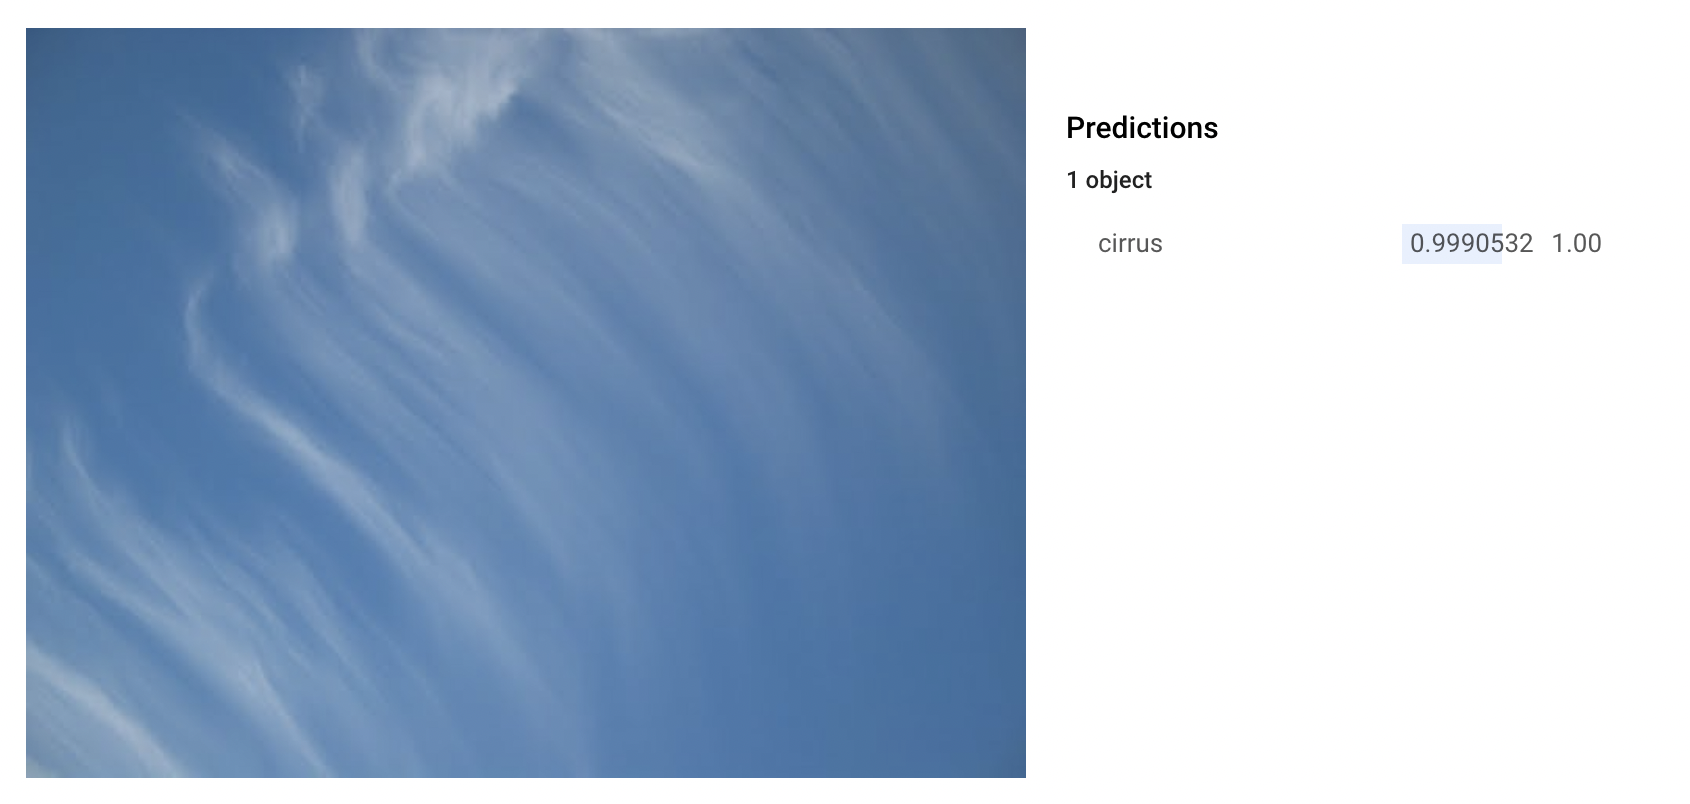
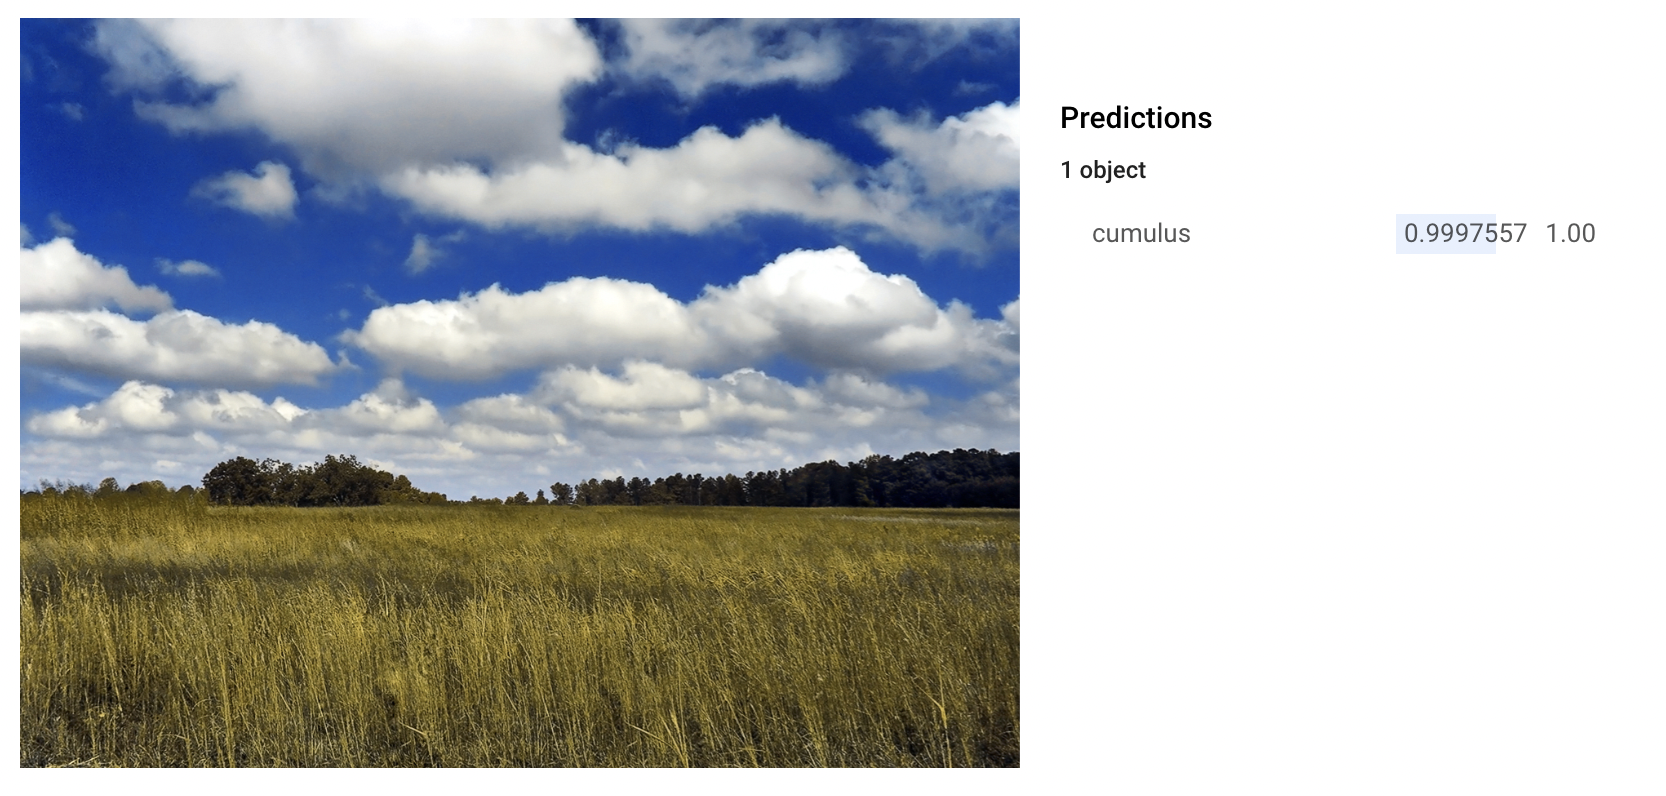
To generate a classification we will use the graphical interface. It is therefore necessary to download on your pc the images we want to classify. Below are two images belonging to two different classes.
As you can see the two images are very different. In the one related to the cumulus there is even the presence of soil. But let’s see the accuracy of the model in classifying these two new images.
To do this, go to the Test & Use tab.

On this page you will see that the templates are available. If you have not created any other templates, the one you have just created is automatically selected.
Click Upload Images to upload one or more images (up to a maximum of 10) that you want to classify.
When the classification is completed you will see something similar.
Excellent: the model correctly classified every type of cloud!
But most of all: Congratulations! You have learned how to automatically train a model from unstructured data such as images and generate predictions about it through the web interface. You now have the tools you need to create your own model on your own image dataset.


