Firebase is a serverless platform for mobile and web application development.
Open source but supported by Google, Firebase leverages Google’s infrastructure and its cloud to provide a suite of tools for writing, analyzing, and maintaining cross-platform applications. In fact, Firebase provides features such as analytics, databases (using noSQL structures), messaging, and crash reporting for managing web, iOS, and Android applications.
In this article we will address how to leverage the NoSQL database made available within a python program.
Creating the database
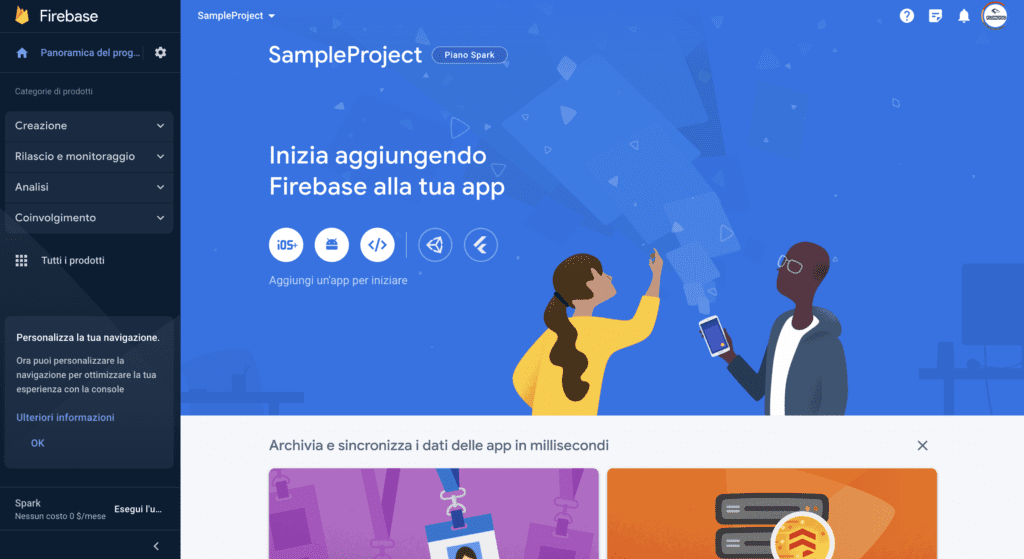
To use Firebase we will first need to create a project. To do this, go to console.firebase.google.com and click on “Add Project.” Enter the name and decide whether to enable Google Analytics for the project (since this is an example we have disabled it, but we recommend it). Once the project is created you will be shown the following page.
First, we are going to create a real-time database, and to do that, click on “Creation” in the left panel and then click on “Realtime Database.” On the next page, select “Create Database.” First you need to select the location of the database, which is up to you. To minimize network latencies, always choose a region that is closest to the server where your application will run and/or where most users will connect.
Next you need to set up security rules. This is a very important part of database management, as it will determine user access to the database. Since this is a test project, you can select “Start in test mode” (we will change it later) and click “Activate.” At this point, you should be redirected to a page like this.

Your database has been created and ready to use! It was as simple as that, wasn’t it!!!?
We just want to point out a couple of things before we proceed. The URL you see in the middle is the address of your database. Since we have set up our database rules so that they can be read and written to by everyone, this means that anyone with that URL can view and edit your database. So it is a good idea to keep that URL to yourself, even if you have more restrictive rules.
In this regard, if you navigate to the rules tab, you will see the following
					{
  "rules": {
    ".read": "now < 1683756000000",  // 2023-5-11
    ".write": "now < 1683756000000",  // 2023-5-11
  }
}
This is probably one of the most important features to consider, because it determines how the database is accessed. Right now we have both the .read and .write properties hard-coded to true, which makes our database very insecure, because anyone with the URL could make any kind of change to it. We will leave it that way for now because it will be easier to test, but later we will show you how you can implement a higher level of security.
Python Integration
The first thing to do is to get a reference to the database in our Python script. To do this, you need to go back to the “Project Overview” page, and in the middle screen you should see this icon. Click on it.

Then give the application a name (which does not matter much) and press “Register.” A screen like this will then be displayed.
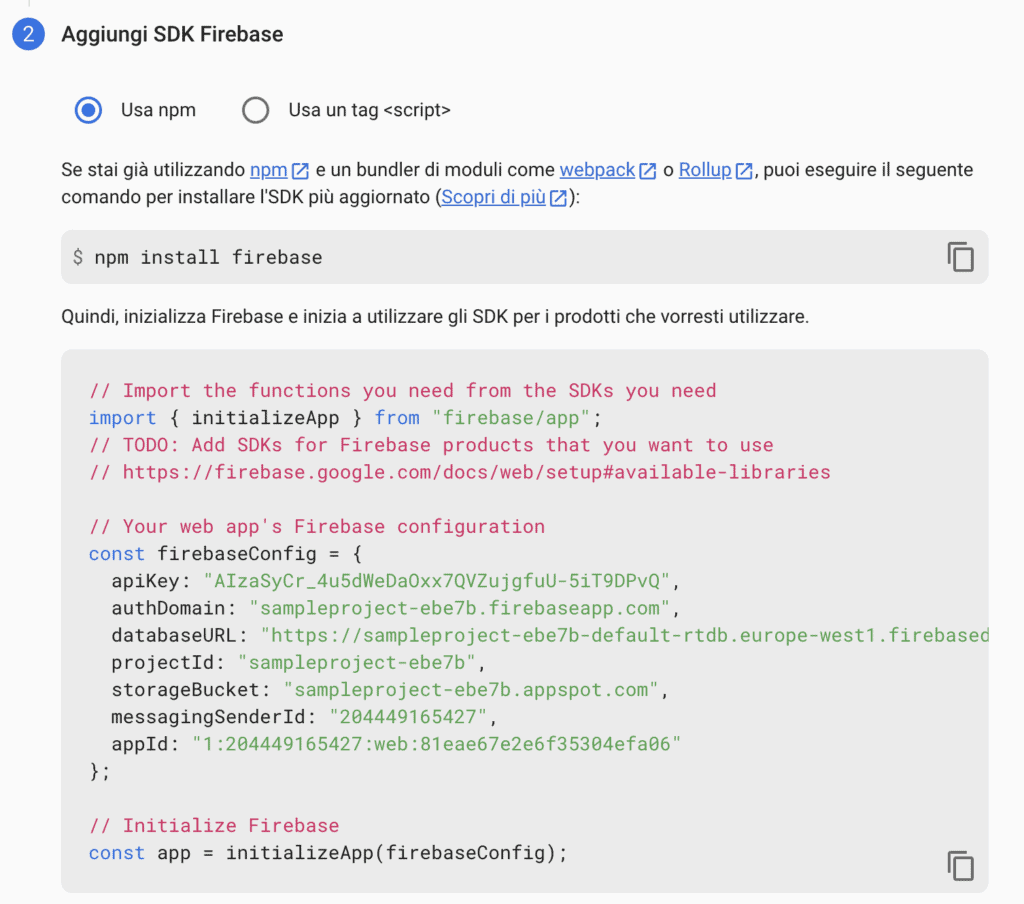
Copy the contents of the firebaseConfig variable.
Attenzione
This information is SENSITIVE, so be sure not to share it.
These variables will be used to configure the database from your script. If you have not yet created a Python script, create it now and add the contents of the firebaseConfig variable you just copied to the Python config variable. Since the copied code is not in Python, don’t forget to add quotation marks to the keys.
Now we can create a reference to our database, and we will use the Pyrebase package to do this. If you have not installed it yet, be sure to run pip install pyrebase4 first.
					import pyrebase

config = {...}

firebase = pyrebase.initialize_app(config)
database = firebase.database()
Now we can access the database and perform some basic operations, also called CRUD (Create, Read, Update, Delete).
Create documents
The first operation we will use is Create, since we want to send data to our database. This is a very simple process: first you create a json with the data you want to send and then you send the data! In this way:
					database = firebase.database()

data = {'name': 'Alessandro', 'age': 40, 'likes_python': True}
database.push(data)
If you run this code, you will have an entry in the database as shown below

Note that you do not need to specify any default structure for the data, as long as you send it in a valid json format. The execution is very fast, which is why it is called Realtime Database.
You may also notice that the data is stored under what appears to be a random string. This is Firebase’s way of uniquely identifying who made the request. If you run the same code again, it will generate a new entry with a similar id.

But what if we want to give a specific id to the data we send? Instead of using the push(data) function, we have to use the set(data) function. However, if we run the same code again, replacing only the function name, we see that now our data is not part of any structure, which is not ideal.

To solve this problem, we need to manually assign it an id. To do this, we modify the code as shown below.
					database = firebase.database()

data = {'name': Alessandro, 'age': 25, 'likes_python': True}
userId = '123456'
database.child(userId).set(data)
If we run this code, we will see that now our data is stored in a “folder” with the specified id. The child command basically adds a folder to the database. If you want, you can create as many nested folders as you want by adding the child function.

Ideally, the user ID we have coded should be something individual to each user, but we will see that later.
Update
Suppose a user logs into your application and updates his or her name. You could always get the current information, update the desired field, and send the information again. But this doesn’t seem very practical! Instead, let’s use the update function and pass the fields we want to change and their values, like this:
					database = firebase.database()
userId = '123456'
# Data we previously sent
# data = {'name': Alessandro, 'age': 40, 'likes_python': True}
# database.child('users').child(userId).set(data)

database.child('users').child(userId).update({'name': 'Mario'})
After running this code, we can see that the user information has been updated.

Read and delete
The two remaining functionalities are very simple. To read information from the database, we can use the get function. For example, suppose we want to retrieve the information of the newly created user.
					user_info = database.child('users').child(userId).get()
print(user_info.val())
We will get the following output:
OrderedDict([('age', 40), ('likes_python', True), ('name', 'Mario')])
Suppose you want to get the information from all users, you can do it like this
					data = {"name": "Luigi", "age": 40, "likes_python": False}
database.child('users').child(userId).set(data)
users_info = database.child('users').get()
print(users_info.val())
We will, therefore, obtain the following result:
OrderedDict([('123456', {'age': 40, 'likes_python': True, 'name': 'Mario'}), ('654321', {'age': 30, 'likes_python': False, 'name': 'Luigi'})])
Keep in mind that we are able to do this because of the rules we have defined. Usually, a given user cannot access the entire database, but since we have set the .read property to True, this is possible.
Finally, regarding the Delete action, you can use the remove function.
					userId = '654321'
database.child('users').child(userId).remove()
users_info = database.child('users').get()
print(users_info.val())
At this point we will only get back a returned document
OrderedDict([('123456', {'age': 40, 'likes_python': True, 'name': 'Mario'})])
That’s pretty much it as far as the basic operations you can do with Pyrebase, you will probably only need these 4 to run a solid application.
Security
The last thing we want to address is how to make the database more secure. It is extremely inadvisable to deploy the application with the rules as we set up at the beginning. This is an important topic and you can find more information in the documentation. To simplify, let’s update our rules with the following:
					{
  "rules": {
    ".read": "auth.uid !== null",
    ".write": "auth.uid !== null"
  }
}
The above code allows reading and writing only to authenticated users. This means that even if someone gets access to the configuration, they will still have to be logged in to make any changes.
In this regard, we have not yet discussed authentication, but since we will now require the user to be authenticated in order to gain access to the database, let us implement it.
Note that it is not necessary for a user to be authenticated in order to use the application, but if this is the case, under the above rules, that user will not be able to update his or her profile, or rather, you, as the owner of the application, will not be able to update that user’s profile on his or her behalf, thus losing valuable information.
To set up an authentication system, go to the “Project Overview” in the Firebase console and in the left panel, under “Creation,” select “Authentication” and then click “Start.” You will then see a screen where you can choose from a wide range of login providers; however, for testing purposes, select the “Email/Password” provider.
After enabling it, you should be able to navigate to the Users tab, which will be empty since we have not yet added any users. The usual way to add a user is to let them create an account themselves, so ideally you would implement a login/sign in system in your application, but to demonstrate how the system works we will just create a user directly from the console. To do this, click “Add User” and then choose an e-mail and password. It does not have to be a valid e-mail and be sure to copy the password, because once the user is created, you will not be able to access it. After creating the user, you will have a new entry in the user table.
Okay, now, before we implement the authentication part from the application side, let’s see what happens if we try to run a simple set Translated with www.DeepL.com/Translator (free version)
					userId = '654321'
data = {"name": "Luigi", "age": 30, "likes_python": False}
database.child('users').child(userId).set(data)
The following error is raised
					raise HTTPError(e, request_object.text)
requests.exceptions.HTTPError: [Errno 401 Client Error: Unauthorized for url: https://sampleproject-ebe7b-default-rtdb.europe-west1.firebasedatabase.app/users/654321.json] {
  "error" : "Permission denied"
}
As you can see, we get a “Permission Denied” error, which means that the current user does not have permission to update that part of the database. Now let’s “login” the user (i.e., type in the e-mail and password) and try making the same request.
					firebase = pyrebase.initialize_app(config)
database = firebase.database()
auth = firebase.auth()
email = ‘alessandro.fiori@flowygo.com'
password = '123456'
try:
    user = auth.sign_in_with_email_and_password(email, password)
    userId = '654321'
    data = {"name": "Luigi", "age": 30, "likes_python": False}
    database.child('users').child(userId).set(data, user['idToken'])
    print("logged in")
except:
    print("failed to log in")
If you run this code, you won’t get any errors and you can verify that the user has actually been added to the database! The difference is that we are sending the set request with the variable user[‘idToken’] that we got from logging in. Again, this is not the ideal way, because the ideal would be for the user to enter his own credentials, but this is just a demonstration.


